If you’re familiar with any of my work, you’ll know that I’m addicted to color. I also love art that looks spontaneous. These salted watercolor letters — perfect for adorning your home with you favorite short quotes — fill my color/spontaneity quota. When I make works like these, I am reminded of my college roommate, Sarah; she used to hang simple, inspirational quotes all over in her bedroom. I loved the feel of her room and the positive vibes coming from all the color and text on the walls.
The great thing about these salted watercolor letters is they are not too tough to make, and your material cost will be very low — perhaps $0 — provided you’ve got some watercolors on hand. So, without further ado, let’s get started:
First, you are going to make stencils for the letters you need. Since I am making “C’EST LA VIE”, I only need A,C,E,I,L,S,T,’. Your stencils don’t need to be anywhere near perfect — in fact, they shouldn’t be! Takes away from the spontaneity factor. Just freehand the letters onto cardstock or thick paper, like so:

It really doesn’t matter if you screw up because it’s a stencil and no one is going to see the stencil. Just draw over it until you know you’ve got something that is cut-out worthy. You should definitely shoot for cutting out the letters with an X-acto knife (a.k.a. “hobby knife”) as opposed to scissors. Not because cutting without an X-acto knife is a sin, but because it will make your life a lot easier and your stencils a lot less crinkled.

You should end up with stencils that have similar size and style to each other. I like my letters to be blocky, like so:

This next step involves a secret weapon: a paper grocery bag. Believe it or not, the material these grocery bags are made of has an incredible ability to amplify the color and texture of watercolor.

Cut your grocery bag into the size you want — I generally choose 9″x12″ or 8″x10″ — and make sure any graphic the sack has is on the back side. Use your stencils (and the cut-out letters that resulted from your stencils) to create a rough layout of the phrase/quote you want to create.

Now comes the fun part! Lay out your the first letter of your first word, and fill it in with ombre watercolor. Make sure you are pressing down firmly on the stencil so no watercolor escapes underneath it. Use a low ratio of water to watercolor paint to make bold, opaque colors. In this watercolor letter, I have started with blue on the bottom, blended it with green in the middle, and finished it with yellow on the top. Then I sprinkled salt on it.
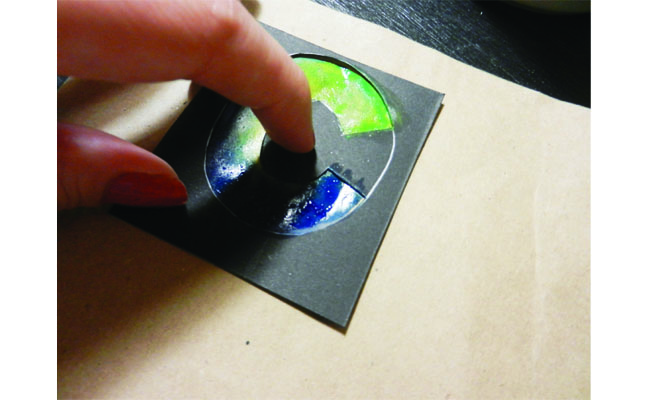
Why salt? Because when you sprinkle salt on wet watercolor and let it dry, it creates an incredibly cool effect, which you will see in more detail in the next couple of photos. Just trust me on this one … plain, grainy table salt works wonders with watercolors. But I digress … once you fill the stencil in, carefully pull the stencil off of the letter.

Your letter might have some bleeding on the edges, which is totally normal and fixable. Just gently drag your brush along the edge to give the watercolor letter a clean finish.

Now, as you go, you’ll want to do the first letter of each line, then the second, then the third, etc. This gives the watercolor letters time to dry and that way you’ll be fine if you have to touch a painted letter with the edge of the stencil for the letter next to it.

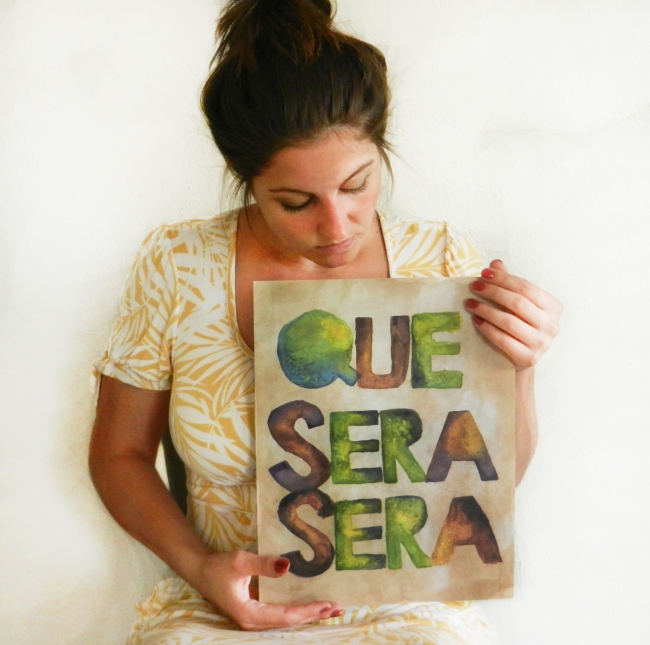
Once you are finished with all your watercolor letters, you’ll want to let them dry for a few hours (I recommend three) so the paint has time to dry around the salt. Here’s what your watercolor letters should look like:

Once they are completely dry, you should brush off the salt to uncover the effect it made on the watercolor. You’ll have salt that leaves the paper willingly, and then you’ll have more belligerent salt (that doesn’t want to leave). Don’t worry about the belligerent salt; I leave it on! It adds its own cool texture and dimension.

You should end up with something that looks like this:

If you don’t want the wrinkles in your work, cut your grocery sack in the correct size and shape to avoid them. Usually you have to have some wrinkles in a 9″x12″ work, but you can usually get away with no wrinkles on an 8″x10″ (as shown below).

These works are fantastic for framing…

Or for digitally manipulating to create awesome prints:

I hope this tutorial is helpful for you! If you have any questions, please feel free to leave them in the comments section. Happy creating!

