Join us for the all-new Beginner’s Modern Calligraphy Online Course, happening now! →

Learn More
    • Facebook
    • Instagram
    • Pinterest
    • RSS Feed
    • YouTube
    • Premium Membership
    • Beginner Calligraphy Course
    • Intermediate Calligraphy Course
    • Calligraphy Worksheets
    • Beginner Watercolor Course
    • The Calligraphy Book
  • Blog
    • Pointed Pen Calligraphy Worksheets
    • Pointed Pen Calligraphy Drills
    • Video Courses
    • Brush Pen Calligraphy
    • Handwriting
    • Hand-Lettering
    • Mail Printables
    • Printable Artwork
    • Procreate Worksheets
      • Cleaning Cloths
      • Erasers
      • Glass Jars
      • Inks
      • Kits
      • Mechanical Pencils
      • Nibs
      • Oblique Pens
      • Paper
      • Protectants
      • Rubber Stamps
      • Rulers
      • Straight Pens
      • Washi Tape
      • Watercolors
      • Wax Seals
  • Help
  • Cart
Log in

Your cart is currently empty!

The Postman's Knock written in calligraphy
Subscribe for $1/week
Sign In
  • My Account
    • Account Details
    • Addresses
    • Payment Methods
    • Order Receipts
    • Subscriptions
    • Printables + Worksheets
    • Video Courses
  • Help
Log in
The Postman’s Knock
  • About
  • Blog
  • Shop
  • Help
  • Premium Membership
  • The Calligraphy Book
Subscribe for $1/week
Sign In
  • Welcome to TPK! This is your first of 2 free articles. For unlimited access to tutorials and articles, join TPK Premium for less than the cost of a latte.

    How to Make Envelope Glue in Four Ingredients

    January 21, 2013

    by

    Lindsey Bugbee

    Tutorials

    Psst! There’s a newer, improved version of this post that you really should read. Click here to check it out!

    • Click to share on Pinterest (Opens in new window)Pinterest
    • Click to share on Facebook (Opens in new window)Facebook
    • Click to share on WhatsApp (Opens in new window)WhatsApp
    • Click to share on X (Opens in new window)X
    • Click to share on Bluesky (Opens in new window)Bluesky
    • Click to share on Threads (Opens in new window)Threads
    • Click to share on Reddit (Opens in new window)Reddit
    • Click to share on Mail (Opens in new window)Mail

    When I first started making handmade envelopes, I noticed a problem: I had to glue all my creations shut using regular Elmer’s glue. Which, you know, aesthetically isn’t a problem … but as far as utility, well, I’m sure my letter recipients had to destroy their envelopes, tearing with all their might, to get them open. Enter envelope glue … lick-to-seal envelope glue, nonetheless! Made with four ingredients that I always have on hand (well, minus the gelatin). Needless to say, my letter-writing world has been rocked.

    Once you’ve made some handmade envelopes using my tutorial, you’ll want to assemble your envelope glue ingredients to make this recipe:

    • 3 TBSP white vinegar
    • 1 envelope gelatin (unflavored)
    • 1 TSP vanilla extract
    • 1 TSP sugar

    Envelope Glue Ingredients

    Once you have assembled the ingredients to make envelope glue, put the vinegar in a container with a lid, like the plastic one I am using here. The reason you will want to do this is once you have created your glue, you’ll have to keep it refrigerated because when it boils down to it, it’s a food product that will mold if left out.

    Vinegar in a Container

    Microwave the vinegar until it’s hot, about 30-45 seconds. If you’re like my mom and you don’t believe in microwaves, you’re welcome to boil it on the stovetop. The whole point is to dissolve the gelatin.

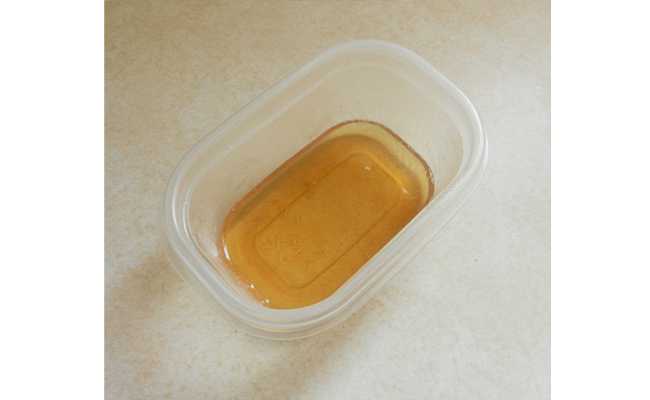
    Add the gelatin to the vinegar and stir to dissolve. Once the gelatin has dissolved, add the sugar and vanilla extract. You should end up with a hot, watery mixture that has the exact color of honey.

    Finished Envelope Glue

    Now you’ve made envelope glue! Next, you’ll lay your envelopes on a smooth surface with the top flap flat and brush your envelope glue on the edges of the flap, like so:

    Gluing

    Gluing

    Allow the glue to completely dry (I give it a good few hours), and now you’ve got a lick-to-seal handmade envelope! As for the leftover glue, put the lid on and refrigerate it. Remember that it will only last two weeks-ish, so try to make as many envelopes as possible in that timeframe to use it up. Every time you want to re-use it, you will need to restore its liquid state in the microwave (otherwise, it just looks like solid jello).

    • Click to share on Pinterest (Opens in new window)Pinterest
    • Click to share on Facebook (Opens in new window)Facebook
    • Click to share on WhatsApp (Opens in new window)WhatsApp
    • Click to share on X (Opens in new window)X
    • Click to share on Bluesky (Opens in new window)Bluesky
    • Click to share on Threads (Opens in new window)Threads
    • Click to share on Reddit (Opens in new window)Reddit
    • Click to share on Mail (Opens in new window)Mail
Sketchbooking

About the author

Hi, I’m Lindsey Bugbee, the illustrator, calligrapher, and author behind The Postman’s Knock (TPK). Since 2012, the TPK Blog has been a vibrant creative space filled with tutorials and lessons on modern calligraphy, hand lettering, and illustration. After publishing The Calligraphy Book, I wanted to elevate the quality of content even further—so I launched TPK Premium. You can join here to receive access to some of the internet’s best creative inspiration and project tutorials.

Join TPK’s free mailing list

This field is for validation purposes and should be left unchanged.

Follow TPK on social media

  • Facebook
  • Instagram
  • Pinterest
  • YouTube
  • RSS Feed
  • Mail
Previous post: How to Make Handmade Envelopes
Next post: Creative Furniture Painting: Henna Tattoo Tabletop

All-time favorite posts

  • The Beginner's Guide to Modern Calligraphy

    The Beginner’s Guide to Modern Calligraphy

    1.5m views
  • 8 Tips to Improve Your Handwriting (Plus a Free Worksheet) | The Postman's Knock

    8 Tips to Improve Your Handwriting (Plus a Free Worksheet)

    842.7k views
  • Painting with Watercolors for Beginners

    Painting with Watercolors for Beginners

    808.2k views
  • Free Brush Pen Calligraphy Worksheet

    Free Brush Pen Calligraphy Worksheet

    481.9k views
  • How to Write Faux Calligraphy (Video Tutorial + Free Worksheet)

    362.7k views
  • 11 Calming Calligraphy Drills Printable | The Postman's Knock

    Celebrating Six Years of the “11 Calming Calligraphy Drills” Worksheet (Free Download)

    290.6k views
  • Lovely Loose Watercolor Flowers Tutorial

    Lovely Loose Watercolor Flowers Tutorial

    204k views
  • The Ultimate DIY Modern Calligraphy Starter Kit

    The Ultimate DIY Modern Calligraphy Starter Kit

    185.8k views

Latest posts

  • Ombré wax crayon calligraphy
    How to Make Ombré Wax Crayon CalligraphySeptember 11, 2025
  • Floral calligraphy by Phyllis Macaluso
    8 Pieces That Helped Me Fall in Love With CalligraphySeptember 5, 2025
  • Athletic shoe created in flourishing
    Introducing the Flourished Athletic Shoe WorksheetAugust 27, 2025
  • Illustrated recipe for chocolate lava cake
    How to Make a Keepsake Illustrated RecipeAugust 20, 2025

Browse by category

Browse by date

50 responses

  1. Anat Avatar
    Anat
    August 7, 2017

    Hi Lindsey!
    Thanks for the recipe.
    Is it normal that I applied the glue to the envelopes about 3 hours ago and it still didn’t dry?
    I don’t know where did I go wrong….
    Should the layer of the glue be really thin?

    thanks in advance!

    Log in to Reply
    1. Lindsey Bugbee Avatar
      Lindsey Bugbee
      August 30, 2017

      Hi Anat! That is strange, unless you are located in an exceptionally humid area? The layer of glue should be thin!

      Log in to Reply
  2. Mercedes Enciso Avatar
    Mercedes Enciso
    September 17, 2016

    What kind of paper do you use to make envelopes? I always love your posts. Thanks for the glue recipe. I certainly need it for my christmas cards.

    Log in to Reply
    1. Lindsey Bugbee Avatar
      Lindsey Bugbee
      September 20, 2016

      Hi Mercedes! I use any type of paper. 🙂 From paper grocery sacks to magazines, I’ve folded it all into an envelope!

      Log in to Reply
  3. Elise Avatar
    Elise
    September 14, 2016

    Hi, can you use gelatin sheets? Since I have a whole pack of it and wanted to use it for something.

    Log in to Reply
    1. Lindsey Bugbee Avatar
      Lindsey Bugbee
      September 20, 2016

      Hi Elise! I’m not sure about that … I’ve never tried using gelatin sheets for this recipe. If you give it a go, please let me know the results!

      Log in to Reply
  4. Reggie Avatar
    Reggie
    February 16, 2016

    You should try filling an empty glue stick container
    with your mixture. I wonder how will that will work.

    Great post. Can’t wait to try it.

    Log in to Reply
    1. Lindsey Bugbee Avatar
      Lindsey Bugbee
      February 24, 2016

      Hi Reggie!

      I’m not sure that that would work … when the mixture is solid, it’s not sticky. However, when it’s liquid, you can apply it to anything. Then, it will dry and can be reconstituted with moisture. I hope that makes sense!

      Log in to Reply
  5. Susana Avatar
    Susana
    February 2, 2016

    Hello,

    Thank you for this, it works great! Just wanted to share. I kept the mixture in a drawer in my office covered for over 2 months. There was no mold or any indications of it going bad. The mixture heated up in the microwave in seconds and was perfect every time.

    Log in to Reply
    1. Lindsey Bugbee Avatar
      Lindsey Bugbee
      February 23, 2016

      Oh, really!? That’s wonderful feedback — I thought you had to keep it in the fridge. 🙂 I love knowing that it doesn’t make a difference either way … it’s even more low-maintenance than I thought! Thanks, Susana!

      Log in to Reply
  6. Meg Avatar
    Meg
    August 3, 2014

    Can this be used to seal the other flaps of a diy envelope as well? I am talking about the body of the envelope as opposed to future use on the flap? Sure would be a more economical option than double-stick tape or glue stick (which I don’t trust!)

    Log in to Reply
    1. Lindsey Bugbee Avatar
      Lindsey Bugbee
      August 3, 2014

      Hi Meg!

      You could use it, but the seal wouldn’t be as strong. The reason I like using this glue for flaps is it’s easy for recipients to open the envelopes after they’ve been sealed, just like commercial envelope glue. I personally like to use white glue (e.g. Elmer’s) for the rest of the envelope … it’s nice and strong!

      Log in to Reply
  7. Caris Avatar
    Caris
    July 15, 2014

    Can you use flavored gelatin and skip the vanilla or would it not turn out right?

    Log in to Reply
    1. Lindsey Bugbee Avatar
      Lindsey Bugbee
      July 17, 2014

      I am not sure about using flavored gelatin … but I do know that you can skip the vanilla! I would guess that flavored would work, but if you used that, I wouldn’t add any sugar. I’d also be sure you’re adding 0.25 oz (appx. 2.5 tsp) of the flavored gelatin, which is how much a packet of plain gelatin is equivalent to. If you try the recipe with the flavored gelatin, please let me know the results! I’m curious. 🙂

      Log in to Reply
  8. Lavette Avatar
    Lavette
    June 25, 2014

    Thx so much for this recipe! I just purchased an envelope board and didn’t think about sealing the envelopes until I was finished with a stack of envelopes to use. Found your recipe and am extremely grateful for it. Will make some tonight.

    Log in to Reply
    1. Lindsey Bugbee Avatar
      Lindsey Bugbee
      June 27, 2014

      No problem at all! I love this recipe because it tastes better than commercial envelope glues, and it’s super easy to make!

      Log in to Reply
  9. Moira Avatar
    Moira
    June 14, 2014

    You have saved the day!! I went to seal & mail my wedding invitations, and realized (horror) that the envelopes the company sent had no glue on them!! I’m going to try this – fingers crossed!

    Log in to Reply
    1. Moira Avatar
      Moira
      June 14, 2014

      We truly can’t thank you enough for this recipe!! It turned a disaster into something really cool 🙂 Our thanks!!! I will recommend this to everyone – we can’t believe how well it worked!

      Log in to Reply
      1. Lindsey Bugbee Avatar
        Lindsey Bugbee
        June 14, 2014

        That is *so* weird that they would send you envelopes without glue already on them!! But I’m really glad to hear that the recipe saved the day! It tastes a little nicer than your average envelope glue, too. 🙂

        Log in to Reply
  10. Sibylle Avatar
    Sibylle
    May 4, 2014

    I was just wondering about where on earth to get “envelope gelatin” I was wondering if I also could use the normal gelatin, because I’ve never seen that mysterious “envelope gelatin”….
    I got it now. 😉
    Thank you so much for sharing your recipe!

    Log in to Reply
    1. Lindsey Bugbee Avatar
      Lindsey Bugbee
      May 4, 2014

      Hi Sibylle!

      “1 envelope gelatin” is actually how gelatin is sold and measured … here in the US, gelatin comes in little packets, called “envelopes”. It is just plain gelatin — and one envelope is equivalent to 1 tablespoon (or 1/4 oz.). 🙂 So: you should be able to buy normal gelatin and measure it out.

      Enjoy!

      Log in to Reply
Older Comments
1 2 3
Newer Comments

Leave a Reply Cancel reply

Sorry! Only TPK Premium members can comment on articles and tutorials. You can become a member here. Already a member? Sign in.

I love how creative lettering and calligraphy can I love how creative lettering and calligraphy can really bring a quote to life — like this iconic line from Macbeth. 💀 It’s so creepy and cool, and this piece does it justice! Learn how to make it yourself with TPK’s tutorial. Search for “creepy halloween calligraphy quote tutorial” on the TPK site (link in bio)! 

#calligraphy #halloweencalligraphy #shakespeare #macbeth #halloweenseason #thisishalloween
I love watching project timelapses — like a comp I love watching project timelapses — like a complicated calligraphy or watercolor project coming together in a matter of seconds. A cleaning timelapse, then, is a no-brainer! My friend mentioned that she does these when she needs a little extra motivation to tidy up. I was totally feeling that this weekend, so I made a couple of these. The anticipation of knowing that I’d get to watch the room become neat in an instant was actually incredibly motivating. It’s the little things, right? 😉 #cleaningtimelapse #cleaning #tidyingup #neatandtidy
🖍️ We have a million crayons laying around be 🖍️ We have a million crayons laying around because my kids love to color (right now, their pages of choice are K-Pop Demon Hunter-themed). While I’m always down for some adult coloring, I also love to letter with crayons! In the latest TPK tutorial — link in bio — you’ll learn how to make this cozy ombré wax crayon calligraphy. 🍁 Switch up the color scheme if you’re not a pumpkin spice person! This technique looks great with light blue, dark blue, and dark purple; or light green, dark green, and dark blue. #crayoncalligraphy #crayolacrayons #waxcrayons #adultcoloring #autumnart #cozylettering #handlettering #lettering
A couple of days ago, I posted a clip from Lesson A couple of days ago, I posted a clip from Lesson 1 of the new Beginner’s Modern Calligraphy Online Course (seriously, join us — enrollment is a *steal* at $5/month, and you get complimentary tutorials [that happen to complement the course] — link in bio)! People seemed to like the story in that clip, so here’s another fun story from the same lesson. Sorry, I can’t confirm who the client was! That was a project with an NDA (Non-Disclosure Agreement). 🤐 Still: a very fun, very cool experience ... I’m grateful that calligraphy has given me cool adventures and connected me to such an amazing community. ✍️

#calligraphystory #moderncalligraphy #learncalligraphy #beginnercalligraphy #pointedpencalligraphy #calligraphy
Lesson 1 of TPK’s Beginner’s Modern Calligraph Lesson 1 of TPK’s Beginner’s Modern Calligraphy Online Course doesn’t actually start with the pointed pen! ✍️ Instead, we ease into it with faux calligraphy and then pencil calligraphy. Here’s a little preview of what the pencil calligraphy lesson looks like. ✏️

If you’ve been wanting to learn calligraphy, join us in this course. It is an absolute *steal* because it’s included with your TPK Premium membership ($5/month - cancel anytime). Once the course concludes in January, you can choose to purchase lifetime access to the videos; or just continue on with us to the next course. For more information, visit the link in my bio!

#learncalligraphy #pointedpencalligraphy #moderncalligraphy #pencilcalligraphy #blackwingpencil #pencilart #letteringart #handlettering #modernlettering #artisticletters #artisticlettering
I’m editing videos for the new Beginner’s Mode I’m editing videos for the new Beginner’s Modern Calligraphy Online Course (🎉 JOIN US! link in profile for enrollment info!!) — and wanted to share this story from Lesson 1. In that lesson, we’ll chat about how to develop your motivation (this story is part of me sharing mine); and we’ll ease into our pointed pen experience with faux calligraphy and pencil calligraphy. Step by step, you’ll develop skills that will serve you for a lifetime ... and surprise and delight those around you, just like my “rent check envelopes” did! ✉️

#mailart #moderncalligraphy #learncalligraphy #storytime #calligraphy #snailmail #snailmailrevolution
Some recipes aren’t just instructions — they’re memories on a page. 💛 I spent some time illustrating one of my favorites, and it turned into the sweetest (literally) keepsake. Calligraphy, watercolor, and a little patience bring the story of a dish to life.

If you’d like to try illustrating your favorite recipe, too, I shared the full process (with helpful printables) on the TPK Blog — link in bio. ✨

#illustratedrecipe #calligraphyart #watercolorillustration #creativeproject #keepsakeart #slowcreativity #handletteringlove #moderncalligraphy #calligraphyinspiration #watercolorart
As much as cooking is an art, illustrating a recip As much as cooking is an art, illustrating a recipe takes it one step further. ✨ In TPK’s latest tutorial (link in bio), I’ll show you how to create an illustrated chocolate lava cake recipe using watercolor. You’ll find helpful PDFs and step-by-step instructions so you can follow along — or use the layout to bring one of your own favorite dishes to life.

Frame it as keepsake art, or give it as a thoughtful handmade gift this holiday season. 🎁

#illustratedrecipe #watercolorart #calligraphycommunity #foodillustration #arttutorial #watercolortutorial #creativeprojects #handmadegifts #keepsakeart #thepostmansknock
The Postman’s Knock

About

  • About Lindsey
  • Get to Know TPK
  • Behind the Scenes
  • How I Learned Calligraphy

Legalese

  • Terms of Service
  • Privacy Policy
  • Refunds & Return Policy
  • GDPR Data Erasure Request

Printable Worksheets

  • Pointed Pen Calligraphy Styles
  • Pointed Pen Calligraphy Drills
  • Brush Pen Calligraphy
  • Handwriting
  • Hand-Lettering

Courses

  • Beginner’s Pointed Pen Calligraphy
  • Intermediate Pointed Pen Calligraphy
  • Beginner’s Watercolors

Help

  • Contact Lindsey
  • Calligraphy FAQs
  • Calligraphy Troubleshooting

Subscribe to the Blog

Join over 125,000 creative minds who receive inspiring, value-packed emails from TPK each week. As a free subscriber, you’ll get helpful tutorials, free worksheets, and creative ideas delivered straight to your inbox—plus the occasional sneak peek or special offer.

This field is for validation purposes and should be left unchanged.

Follow TPK on Social Media

  • Facebook
  • Instagram
  • Pinterest
  • YouTube
  • RSS Feed
  • Mail

© Copyright 2025 The Postman’s Knock – All rights reserved

Manage Consent
To provide the best experiences, we use technologies like cookies to store and/or access device information. Consenting to these technologies will allow us to process data such as browsing behavior or unique IDs on this site. Not consenting or withdrawing consent, may adversely affect certain features and functions.
Functional Always active
The technical storage or access is strictly necessary for the legitimate purpose of enabling the use of a specific service explicitly requested by the subscriber or user, or for the sole purpose of carrying out the transmission of a communication over an electronic communications network.
Preferences
The technical storage or access is necessary for the legitimate purpose of storing preferences that are not requested by the subscriber or user.
Statistics
The technical storage or access that is used exclusively for statistical purposes. The technical storage or access that is used exclusively for anonymous statistical purposes. Without a subpoena, voluntary compliance on the part of your Internet Service Provider, or additional records from a third party, information stored or retrieved for this purpose alone cannot usually be used to identify you.
Marketing
The technical storage or access is required to create user profiles to send advertising, or to track the user on a website or across several websites for similar marketing purposes.
Manage options Manage services Manage {vendor_count} vendors Read more about these purposes
View preferences
{title} {title} {title}
All About the Brause Rose Nib

inspiration in your inbox

Let The Postman’s Knock Spark Your Creativity

TPK’s innovative newsletters are an artistic treat. Join the 125K+ subscribers who have already discovered The Postman’s Knock, and receive 10% off your first Digital Catalog order.

This field is for validation purposes and should be left unchanged.
Writing Copperplate Calligraphy

Unlock Exclusive Perks with Premium Plus

Fuel your inspiration and creativity with TPK Premium Plus! Members enjoy three free worksheets or learning resources every month, unlimited video course access, member-exclusive tutorials, and a 10% discount on all Supplies Shop orders.

join today ($15)